Session 4 Summary
The Crypts of Terror

Last session, the heroes had just finished demolishing a nest of kruthiks and were
deciding what to do next. Checking their nonexistent map, the heroes determined
that there was only
one unexplored area remaining on the first floor of Shadowfell
Keep. Passing by the fungus-covered bronze doors, the heroes discussed the possiblity
of going after the blue slime again, but the Judge simply reconfirmed his unwillingness
to fight the thing. The heroes returned to the entry room and headed south down
a small flight of stairs. Entering into a maze-like tangle of hallways, the heroes
spotted a
strange-looking rune inscribed into the floor in several places.
Travok approached one the runes, but was not able to identify its magic - only that
it would trigger if stepped upon. Avoiding the runes and scouting further ahead,
Merryweather found that the halls were populated with zombies, though not nearly
as fearsome as the ones in the Winterhaven cemetary. Surprising the weak (and frankly
downright lethargic) zombies, the heroes found a set of
huge ornate stone doors picturing a relief of a great armored knight holding
a sword. Deciding that there were pretty good odds of something big lurking behind
the doors, the heroes returned to the winding passageways, avoiding the runes. After
some more exploration, the heroes discovered another room full of pitiful zombies.
Unfortunately, the room was in accesssible without stepping on one of the runes,
so the heroes decided to let the zombies do the honors. As a zombie walked over
the rune, a
horrible shriek tore through the crypts and struck fear into
the adventurers standing too close to the rune. The zombies were compeltely unaffected,
as noise didn't reall seem to bother them, which is about all the poor wretches
had going for them. Merryweather, panicked by the sound, ran away from the rune,
straight into another crypt filled with zombies. Split in half against two groups
of zombies at once, the party was in no trouble whatsoever and tore the zombies
to pieces. Having reached the end of the crypts, the heroes spotted another door
with a
strange image on it. After studying the arcane symbol intensely, the
heroes determined that the sign had a hidden meaning - that these doors led down
the next floor. Not wanting to leave any loose ends (aside from the blue slime),
the heores returned to the huge stone doors, carved with ornate relief and everything.
The Ancient Tomb of the Fallen Paladin
The doors led into a huge room lined with upright
sarcophagi. In addition,
skeletons stood guard in front of the doors at the end of the hall, and immediately
attacked the heroes. Unfortunately, Merryweather did not immediately see the other
skeletons and ran headfirst into the crowd, quickly becoming surrounded. The skeletons
proved to be vicious attackers in combat, but went down rather easily. After destroying
the skeletons, the heroes searched the sarcophagi, but they were strangely empty.
Heading to the back of the hall, the heroes found
two altars on the sides
of another set of stone doors, similar to the ones leading into the chamber. In
addition, the ceiling held a huge dome depicting a mural of a great metallic dragon
with knights kneeling in prayer all around. The Judge, being a worshipper of Bahamut,
immediately recognized the mural as his deity and knelt in prayer. Chase searched
the altars and found an
ancient script.
"The Platinum Dragon is my rock, my fortress, and my deliverer. He is my stronghold,
my refuge, and my armor agasint the foes of life - I need only kneel and offer him
my praise."

After reading aloud the script, the sarcophagi immediately slammed shut and light
shone through the entire hall. The heroes then decided it was time to head through
the great doors to the coffin room. Upon entering the great room, the heroes immediately
saw a
humanoid skeleton dressed in full plate and carrying a large sword
standing near the coffin. The Judge, expecting the worst, approached the skeleton
with the intent to destroy it, though it had not yet made any move toward the heroes.
Once the Judge reached the stairs, the skeleton commanded him to halt, and the Judge
stopped. The skeleton went on assert that
"the rift shall not be reopened"
and then demanded to know what the heroes were doing in Shadowfell Keep. The Judge
presented his holy symbol to Bahamut, and the skeleton said he felt he could trust
the paladin. The skeleton then went on to question the other party members about
their reasons for entering Shadowfell Keep. Chase attempted to convince the skeleton
that he was there to lead the party against the death cult, but the skeleton was
hesitant to believe him. Merryweather attempted to bluff his way past the skeleton
and hide his real reasons for being in the keep. Unfortunately, the skeleton again
was not convinced. Unfortunately, Travok's mind raced as he tried to think of a
way to convince the skeleton that he had good intentions. Travok knew that he was
not skilled in convincing people, and also had no knowledge of Bahamut or Orcus.
Eventually, Travok just said quite simply that he was there to stop the rift from
opening, but the skeleton was a tough sell. Finally, Mialee stepped in and was able
to speak for the other three party members in question. With exceptional tact, Mialee
talked the skeleton into trusting the party members without the need for trickery
or deceit. The skeleton, convinced of the party's good intentions, introduced himself
as the late
Sir Keegan. The party remembered the tale of Shadowfell Keep
as told by Valthrun the Prescient ans asked Sir Keegan about it. When questioned
about the legend, Sir Keegan told a somewhat different story.
Sir Keegan spoke of the Shadowfell Keep and how he oversaw its defense. He explained
that it was his job to guard the shadow rift and make sure that it was never opened.
However, over time, the rift began to exert its influence on him. He fought the
evil off for as long as he could, but one night,
he was overcome. The rift
possessed him, and he killed his family. He then went to his guards and began to
kill them one by one. Sir Keegan's guards realized he was not in his right mind,
and fought him to the catacombs beneath the keep. There, Sir Keegan realized what
he had done and locked himself within the tomb he now stood in, to suffer for eternity.
Sir Keegan then went on to ask the heroes to stop Kalarel and his followers from
opening the shadow rift. Finally, the late paladin entrusted his sword,
Aecris,
to the Judge. The party asked him to come and help defeat Kalarel, but Sir Keegan
said that he was unable to leave his tomb, as he must continue to serve his punishment.
The heroes left Sir Keegan's tomb, and then discovered that no one could actually
use Sir Keegan's sword. Someone joked about selling the sword after their return
to Winterhaven, but it seemed like a bad idea, as no one likes to have angry ghosts
of paladins coming after them. So, the heroes returned to teh "B2" door and ehaded
down the stairs.
Further into the Catacombs
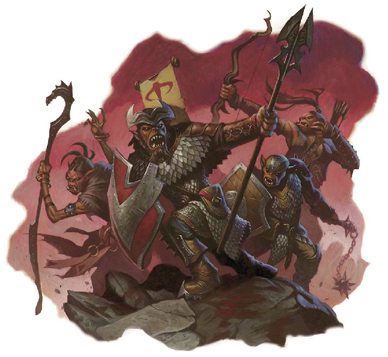
The heroes reached the bottom of the stairs and entered a room with some
hobgoblin
guards, which the heroes had not encountered before. The heroes engaged
the well-armored hobgoblins, but more and more poured in from the side rooms. Finally,
when it seemed like things couldn't get any worse, a
giant jumping spider
lept out from a back room and assaulted Mialee. Mialee, in a fit of bad luck, missed
with all of her attacks against the spider, and was helpless as the thing lept over
the battle and pounced on her. As the thing sunk its poisonous fangs into her,
Mialee
seemed to have died. This was the first death the party had experienced,
and everyone was shocked. Demoralized, the party doggedly fought the armored hobgoblins
and jumping spider. The spider, though it came out swinging, went down after only
a few hits and the party was victorious. After the fight, Mialee coughed and gasped,
and the party ran over to save her. It seemed that she had somehow pulled through
right as the fight ended, much to everyone's relief. The party took a short rest
and then searched the outer rooms, which seemed to be devoid of enemies, as they
had all run into the room during the previous fight. To the north, the heroes found
a destroyed cage, where the jumping spider had escaped. The heroes went through
the east corridor, then headed south to an enormous room filled with a
massive statue
of a titan, two large statues of dragons, and 4 small statues of cherubs.
The heroes suspected traps, but were unprepared when the titan statue swung its
sword in a huge arc, hitting Merryweather as he approached. From a distance Merryweather
inspected the statue to see if it could be disarmed, but he was unable to find any
means to disable the statue. The heroes decided to deal with the trap later and
backtracked north and east. The heroes jumped over a pit trap and raised a portcullis
to enter what looked like a dining room of sorts. As soon as they enterd, two doors
slammed open, revealing more armored hobgoblins and a
hobgoblin warlord.
Merryweather immediately ran up to the door and blocked the hobgoblin soldiers in
the room while the Judge engaged the warlord and his underlings. Despite some early
luck, Merryweather eventually received a flurry of flail strikes at the hands of
the hobgoblins and was taken down. The warlord immediately rushed over and commanded
the hobgoblines to attack, allowing them all to move and attakc at once. The Judge,
irate at the warlord, struck a devastating blow to him and
nearly slew him in one
hit. Chase ordered Merryweather up while Travok blasted the warlord and
killed him. Without their leader, the hobgoblin guards were demoralized and were
quickly dispatched. The heroes are getting closer to Kalarel with every step. There's
no telling when he might show up.
